After a couple of threads about constructing homemade boxes I thought I share what I've been making the last couple of evenings, neither of the 2 boxes am I completely satisfied with, but it`s all a learning curve & hopefully I`ll come up with a box I`m happy with along the way, with that in mind I thought I`d share this just in case it is of any use to anyone else in the future.
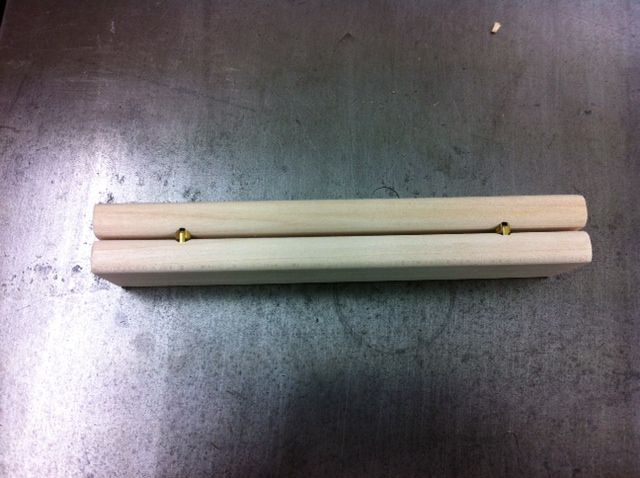
My first effort was a very basic box made with a router & off cuts of Maple.
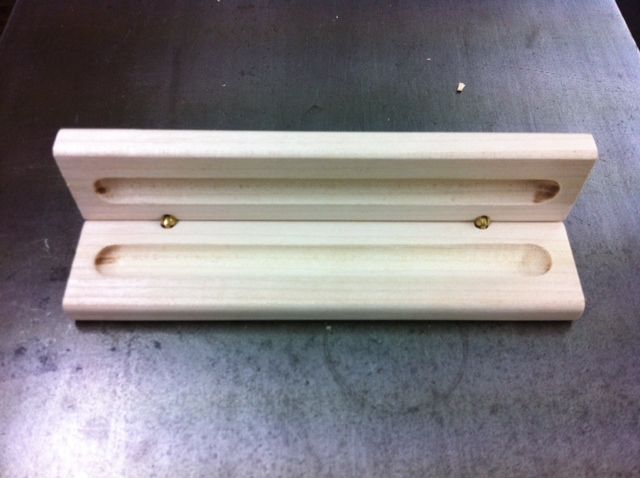
The problem I found is for this box to open to 90 degrees the gap at the back was larger than I liked, also it was very difficult to prevent the scorching at the ends of grooves & basically I didn't like the look of it it.
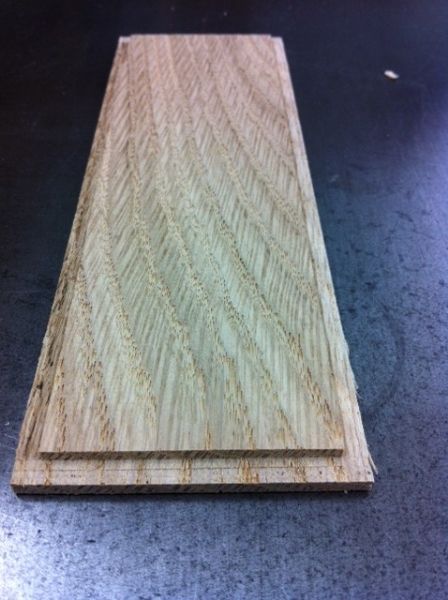
Moving away from a solid box I figured if I was going to make one that was made up with joints I needed to minimize the amount of wood preparation otherwise the time taken to construct would make the box unviable. To this end I came up with the idea of making the box from 2 basic components.
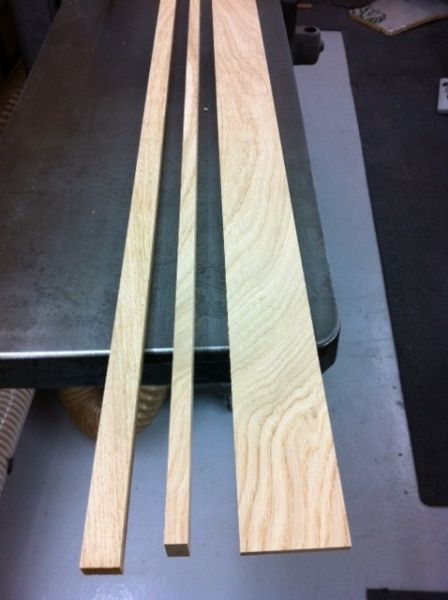
The 2 pieces of Oak on the left are 12x21mm the right hand piece 60x6mm all just machined out of a short offcut.
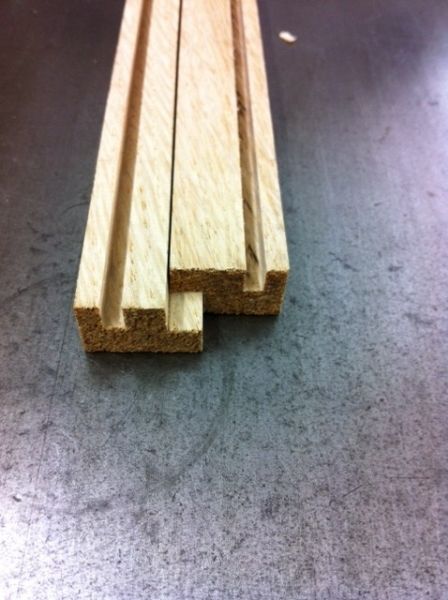
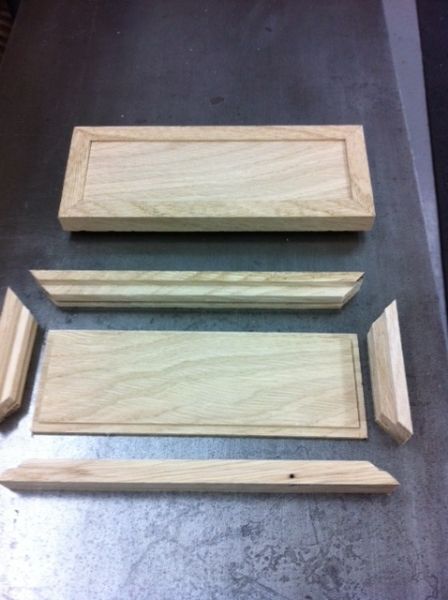
Grooves & rebates were cut in the 2 same sized sections, the grooves for a loose top & bottom the rebates so the 2 pieces will marry together when placed one on top of the other.
The top & bottom were cut to size & a rebate cut on the edges to fit the grooves.
Then it was simply a matter of mitering the small sections & gluing them together with the panel inserted.
Non of this took particularly long & with stop blocks on the chop saw cutting the small components was straight forward. As this was prototype I CA glued the miters & then reinforced them with splines.
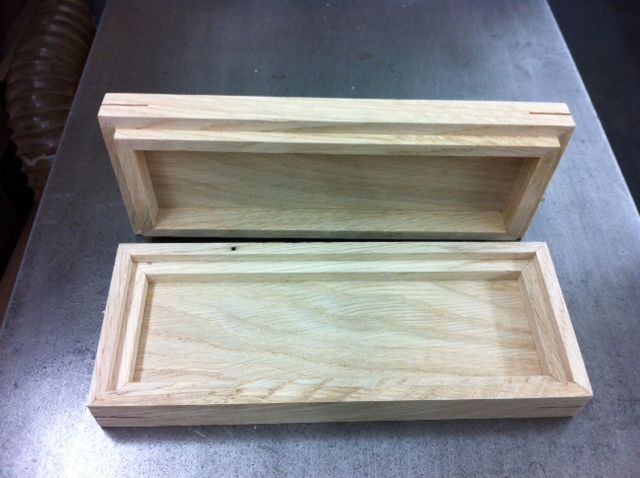

I certainly prefer this box to the first but I am still not happy with it particularly as a box that I could produce a lot of. I have a couple more ideas but would be glad to receive any input anyone else could offer.
My first effort was a very basic box made with a router & off cuts of Maple.

The problem I found is for this box to open to 90 degrees the gap at the back was larger than I liked, also it was very difficult to prevent the scorching at the ends of grooves & basically I didn't like the look of it it.

Moving away from a solid box I figured if I was going to make one that was made up with joints I needed to minimize the amount of wood preparation otherwise the time taken to construct would make the box unviable. To this end I came up with the idea of making the box from 2 basic components.

The 2 pieces of Oak on the left are 12x21mm the right hand piece 60x6mm all just machined out of a short offcut.
Grooves & rebates were cut in the 2 same sized sections, the grooves for a loose top & bottom the rebates so the 2 pieces will marry together when placed one on top of the other.

The top & bottom were cut to size & a rebate cut on the edges to fit the grooves.

Then it was simply a matter of mitering the small sections & gluing them together with the panel inserted.

Non of this took particularly long & with stop blocks on the chop saw cutting the small components was straight forward. As this was prototype I CA glued the miters & then reinforced them with splines.


I certainly prefer this box to the first but I am still not happy with it particularly as a box that I could produce a lot of. I have a couple more ideas but would be glad to receive any input anyone else could offer.

