• Thanks for visiting The Penturners Forum today.

    There are many features and resources that currently you are unable to see or access, either because you're not yet registered, or if you're already registered, because you're not logged in.

    To gain full access to the forum, please log in or register now. Registration is completely free, it only takes a few seconds, and you can join our well established community of like-minded pen makers.

Kitless pens 2 and 3

PensFromNo11

Full Member
Joined
Jun 6, 2023
Posts
97
Location
Buckinghamshire
First Name
Darren
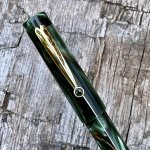
Continuing my kitless journey here are pen 2 and pen 3.
Pen 2 was not So good, I made the mistake of trying to add a clip and finials - for me this was a step to far and over complicated things so Ive decided to keep things as simple as possible for the next few pens.

Pen 3 was just a simple cap, body and section and overall it went ok.

In the cap I stepped the inside profile to keep some weight to it, but with this translucent material I’m not keen on the look.

I still have some work to do on the triple threads on both body and cap, they work ok, but I think the tenon on the body must of been a little out as its only catching on the last few threads (only half a turn to close - that wasn’t the design).

Happy with the overall look of cap and body, but the section shape defiantly not right yet. I nailed the threads for the nib and connection to the body, but the shape will need some work.

I only have a wood lathe, so any advice on getting the tenons square would be good or is it as I imagine just experience?
 

Attachments

  • pen 2.jpg
    pen 2.jpg
    4.9 MB · Views: 36
  • pen 3.jpg
    pen 3.jpg
    4.8 MB · Views: 35
  • IMG_7697.jpeg
    IMG_7697.jpeg
    2.3 MB · Views: 29
  • IMG_7696.jpeg
    IMG_7696.jpeg
    2.8 MB · Views: 27
  • IMG_7694.jpeg
    IMG_7694.jpeg
    3.6 MB · Views: 28
  • IMG_7693.jpeg
    IMG_7693.jpeg
    2.3 MB · Views: 28
  • IMG_7698.jpeg
    IMG_7698.jpeg
    3.1 MB · Views: 33

flexi

Executive Member
Joined
Sep 12, 2014
Posts
6,249
Location
Maidstone
First Name
mark
I like no2 although I am not sure on your choice of finial colour, that said its a very nice job. The proportions of your sections look great on no3..... Onwards and upwards :claps: :claps:
 

PensFromNo11

Full Member
Joined
Jun 6, 2023
Posts
97
Location
Buckinghamshire
First Name
Darren
I like no2 although I am not sure on your choice of finial colour, that said its a very nice job. The proportions of your sections look great on no3..... Onwards and upwards :claps: :claps:
Thank You.
I'm seeing these as prototypes and the material choice is (cheap) so I can see what's going on.
The section just doesn't look quite right in the flesh, maybe a little thicker with more of a waist in the middle rather than near the end as it is.
 

DuncSuss

Full Member
Joined
Mar 27, 2023
Posts
50
Location
Wilmington, MA
First Name
Duncan
Coming along nicely!

Please don't give up on the clips and finials - if nothing else, you'll improve your threaded connections at double the speed when you're making twice as many per pen.

I recommend you sacrifice one or two of your cheapest blanks simply to practice making a tenon and threading it, then part it off and do another, and another ,,, Try varying the diameter of the tenon - from the full major diameter of the die (as in, 10mm if the die is specced as M10 x 0.75) all the way down to the minor diameter (as in 9.25mm for the M10 x 0.75 die). Chamfer the front corner at about 45 degrees so the leading thread of the die cuts into a slope rather than beginning its work on the flat.

When you compare the results, I think you'll find that too large a tenon gives a poor result - the peaks of the threads crumble - and I generally aim to have flat rather than sharp peaks. I polish the tenon before cutting the threads, and that polished flat looks better to me than a sharp peak that's hard to polish.

Hang in there!
 

PensFromNo11

Full Member
Joined
Jun 6, 2023
Posts
97
Location
Buckinghamshire
First Name
Darren
Coming along nicely!

Please don't give up on the clips and finials - if nothing else, you'll improve your threaded connections at double the speed when you're making twice as many per pen.

I recommend you sacrifice one or two of your cheapest blanks simply to practice making a tenon and threading it, then part it off and do another, and another ,,, Try varying the diameter of the tenon - from the full major diameter of the die (as in, 10mm if the die is specced as M10 x 0.75) all the way down to the minor diameter (as in 9.25mm for the M10 x 0.75 die). Chamfer the front corner at about 45 degrees so the leading thread of the die cuts into a slope rather than beginning its work on the flat.

When you compare the results, I think you'll find that too large a tenon gives a poor result - the peaks of the threads crumble - and I generally aim to have flat rather than sharp peaks. I polish the tenon before cutting the threads, and that polished flat looks better to me than a sharp peak that's hard to polish.

Hang in there!
Thank you, some great advice.
Unfortunately I haven't been well enough to get in the workshop this week, but I wont give up and as soon as I can Ill do some practice pieces as you described.
 

DuncSuss

Full Member
Joined
Mar 27, 2023
Posts
50
Location
Wilmington, MA
First Name
Duncan
Thank you, some great advice.
Unfortunately I haven't been well enough to get in the workshop this week, but I wont give up and as soon as I can Ill do some practice pieces as you described.
Hope you feel better soon.

I forgot to mention how I make tenons. I bought some old lathe tools on eBay and re-ground a scraper so it has a straight but angled front edge. I sharpen that edge and the left side. It lets me get all the way into the corner (where the blank gets wider) without catching, nibbling my way along the tenon from the end in small steps. My first mistake (which I still make from time to time) was trying to shave the entire tenon in one pass. Nibbling at it is less stress on the tool and less stress on the blank (so it flexes less, reducing chatter).
 

PensFromNo11

Full Member
Joined
Jun 6, 2023
Posts
97
Location
Buckinghamshire
First Name
Darren
Hope you feel better soon.

I forgot to mention how I make tenons. I bought some old lathe tools on eBay and re-ground a scraper so it has a straight but angled front edge. I sharpen that edge and the left side. It lets me get all the way into the corner (where the blank gets wider) without catching, nibbling my way along the tenon from the end in small steps. My first mistake (which I still make from time to time) was trying to shave the entire tenon in one pass. Nibbling at it is less stress on the tool and less stress on the blank (so it flexes less, reducing chatter).
Thank you

I've a negative rake box tool that would work like your scraper, I think it has a small radius in the corner so a skew as a scraper to clean up the corner could work.
I'm looking forward to get back in the workshop and practice.
 

Phil Dart

Moderator
Executive Member
Joined
Nov 28, 2014
Posts
5,476
Location
Colebrooke, Devon
First Name
Phil
The clip on your blue pen has a little flat, circular area into which can be glued a little cabochon. If you make a small cabachon out of the same material as the tenons, it helps to bring the whole lot together.
 

PensFromNo11

Full Member
Joined
Jun 6, 2023
Posts
97
Location
Buckinghamshire
First Name
Darren
The clip on your blue pen has a little flat, circular area into which can be glued a little cabochon. If you make a small cabachon out of the same material as the tenons, it helps to bring the whole lot together.
Hi Phil, thats sort of what I tried (see pics - not glued as practice)
It seems I have to make some sort or grove for the ring and a slot for the clip to protrude - which maybe a step to far at the moment, but ill keep trying.
 

Attachments

  • IMG_7736.jpeg
    IMG_7736.jpeg
    2.2 MB · Views: 1
  • IMG_7737.jpeg
    IMG_7737.jpeg
    2.1 MB · Views: 1

Phil Dart

Moderator
Executive Member
Joined
Nov 28, 2014
Posts
5,476
Location
Colebrooke, Devon
First Name
Phil
We're talking at cross purposes Darren. I was referring to the other end of that particular clip, where you can add a wee cabochon (or button) to compliment the finials.

K cabochon.jpg

As far as mounting the clip on the cap is concerned, what you've done is correct. You only need a slot for the arm of the gasket if you want to hide the gasket - in which case you would use a gasket that has a smaller diameter than the cap. It would then sit inside a recess, but needs to exit via a "letterbox" type of slot that you cut into the side of the cap (or finial). On the other hand, if the cap is the same size as the gasket. which yours is, you will see the gasket and you don't need a slot.
 

PensFromNo11

Full Member
Joined
Jun 6, 2023
Posts
97
Location
Buckinghamshire
First Name
Darren
We're talking at cross purposes Darren. I was referring to the other end of that particular clip, where you can add a wee cabochon (or button) to compliment the finials.

As far as mounting the clip on the cap is concerned, what you've done is correct. You only need a slot for the arm of the gasket if you want to hide the gasket - in which case you would use a gasket that has a smaller diameter than the cap. It would then sit inside a recess, but needs to exit via a "letterbox" type of slot that you cut into the side of the cap (or finial). On the other hand, if the cap is the same size as the gasket. which yours is, you will see the gasket and you don't need a slot.
Got you now... Its whole new world to me and trying to work things out is taking time.

re reading your first comment makes perfect sense to me now, when initially read it I was trying to work out how to hide the gasket and thought you had read my mind, what you've now described is perfect thank you.
Thank you also for the heads up about the 'wee cabochon (or button)' I understand now.
 
Top