• Thanks for visiting The Penturners Forum today.

    There are many features and resources that currently you are unable to see or access, either because you're not yet registered, or if you're already registered, because you're not logged in.

    To gain full access to the forum, please log in or register now. Registration is completely free, it only takes a few seconds, and you can join our well established community of like-minded pen makers.

Kitless Questions

Burt25

Full Member
Joined
Apr 29, 2016
Posts
147
Location
N Ireland
First Name
Ian
Firstly let me apologise in advance if this has been asked a thousand times before, but I've reached the point where I think I need to take the plunge and try kitless. Ive been successfully selling my pens to collectors for the past few months and Im starting to get asked for fully bespoke pens with ebonite sections. I know theres information and various tutorials on the web but I would like to hear from others on here how best to get started? The first thing I want to know is - is it realistic to produce top quality kitless pens while solely using a wood lathe? If my calculations are correct, I need to spend somewhere in the region of £200-£300 on taps and dies? Question is what size to start off with 10,11,12,13,14mm?? I see that many kitless makers use El Grande sections, but can the El Grande nib be swopped out for say a Beaufort?

Would really appreciate any advice on getting started down this road before I start spending a fortune in kit.
 

Pierre---

Full Member
Joined
Feb 3, 2016
Posts
231
Location
France
First Name
Pierre
I'll try to answer your questions in due order, according to my experience. Others could think another way...

  • You definitely don't need a metal lathe. I do all my kitless on my little wood lathe, I'm quite happy with it, it is precise enough.
  • Expensive taps and dies are double or triple start. They are a plus because if you use them you need less turns to screw the cap, but they are not at all necessary, they also have cons. IMHO, start with regular cheap taps, you will have plenty of work with them to set up everything, then you may decide to change for multistart. You do need a special tap for the nib to section, but it is not so expensive.
  • I would suggest to start with M9 and 10 (section to barrel), 12 and 13 or 14 (barrel to cap).
  • If you use a El Grande section, you will not make a kitless any more, and you'll loose the advantage of it: with a real kitless, YOU decide the material you use (is El Grande section made of ebonite?), dimensions and design.
So I would advise to buy some cheap acrylic blanks to allow for trials and errors (you will encounter a lot!), a #6 Bock nib with its tap, a clip and a converter from Phil at Beaufort, make plans for a section around it, for a barrel and a cap, and up you go!

Happy turning!
 

Attachments

  • 100_1980 comp.jpg
    100_1980 comp.jpg
    432.9 KB · Views: 121

Penpal

Grand Master
Joined
May 26, 2013
Posts
25,342
Location
Canberra AUSTRALIA
First Name
Peter
As a do it yourself admirer and practitioner but not ever devotee I appreciate firstly your enquiry Ian then your sensible reply Pierre. Both have merit.

Look carefully at the MIK from Australia pens where he uses known pen kits to establish his own style. Countless examples of pens that are shown on forums demonstrate the ease of purchase that overcome the outlay and indeed remove the failure rate incurred in threading etc.

A kit is but a starting point the cladding or finishing is up to you.

If you make your own nibs, fillers, clips, nib holders then lo and behold you are going kitless other than that still faking it.

The idea that entirely kitless pens are even necessary is not true.

If you seek pen glory or market dominance go for it. It will become obsessive,compulsive and good luck to you in your quest. The majority of pen makers seek to live within their means producing their best using the huge variety of kits to assist them.

I look forward to seeing your work in the future may you reach the end of the rainbow.

Peter.
 

Pierre---

Full Member
Joined
Feb 3, 2016
Posts
231
Location
France
First Name
Pierre
Look carefully at the MIK from Australia pens where he uses known pen kits to establish his own style.
Hi Peter mate, any link?


I do agree with you from the maker point of view. It is very possible to develop one's style from kit parts (and I make a lot of kits for the reasons you mentioned). But Ian's question was "I'm starting to get asked for fully bespoke pens with ebonite sections". So it is an user point of view. As Ian, I have been asked many times: "Could you make me a pen with a section made of... (horn, ebonite, galalith, celluloid, casein, whatever) with this particular shape and this precise diameter?" After saying ten times "No Sir, I can't because I use kits and I don't know how to make a section", I learnt to thread (this is the point!) and to answer "With pleasure".
And get plenty of $£€££$$£. :ciggrin:

So of course making a whole pen from scratch could be surrealistic, but there is a midway between that and using kits parts to make a kitless or even an own-style kit. When you know how to thread, you are more able to answer customers wishes. And to have fun in the bargain. :congratulatory:

Peter, thanks for your post stimulating discussion!
 

Penpal

Grand Master
Joined
May 26, 2013
Posts
25,342
Location
Canberra AUSTRALIA
First Name
Peter
Hi Peter mate, any link?


I do agree with you from the maker point of view. It is very possible to develop one's style from kit parts (and I make a lot of kits for the reasons you mentioned). But Ian's question was "I'm starting to get asked for fully bespoke pens with ebonite sections". So it is an user point of view. As Ian, I have been asked many times: "Could you make me a pen with a section made of... (horn, ebonite, galalith, celluloid, casein, whatever) with this particular shape and this precise diameter?" After saying ten times "No Sir, I can't because I use kits and I don't know how to make a section", I learnt to thread (this is the point!) and to answer "With pleasure".
And get plenty of $£€££$$£. :ciggrin:

So of course making a whole pen from scratch could be surrealistic, but there is a midway between that and using kits parts to make a kitless or even an own-style kit. When you know how to thread, you are more able to answer customers wishes. And to have fun in the bargain. :congratulatory:

Peter, thanks for your post stimulating discussion!

Thanks mate MIK is a member of the IAP and the Aussie U Beaut Forum contact him that way on a pm and tell him I sent you we are friends.

More power to you with the challenge.

Peter.
 

Burt25

Full Member
Joined
Apr 29, 2016
Posts
147
Location
N Ireland
First Name
Ian
I'll try to answer your questions in due order, according to my experience. Others could think another way...

  • You definitely don't need a metal lathe. I do all my kitless on my little wood lathe, I'm quite happy with it, it is precise enough.
  • Expensive taps and dies are double or triple start. They are a plus because if you use them you need less turns to screw the cap, but they are not at all necessary, they also have cons. IMHO, start with regular cheap taps, you will have plenty of work with them to set up everything, then you may decide to change for multistart. You do need a special tap for the nib to section, but it is not so expensive.
  • I would suggest to start with M9 and 10 (section to barrel), 12 and 13 or 14 (barrel to cap).
  • If you use a El Grande section, you will not make a kitless any more, and you'll loose the advantage of it: with a real kitless, YOU decide the material you use (is El Grande section made of ebonite?), dimensions and design.
So I would advise to buy some cheap acrylic blanks to allow for trials and errors (you will encounter a lot!), a #6 Bock nib with its tap, a clip and a converter from Phil at Beaufort, make plans for a section around it, for a barrel and a cap, and up you go!

Happy turning!

Thank you for your response Pierre- my observation from dealing with fountain pen connoisseurs is that metal sections are generally frowned upon- I assume this is because from a purists point of view metal sections do not feature in traditional fountain pen manufacture? Also I think that kit pens are perceived as 'heavy' I've had a couple of potential customers equire about weight and when I confirmed that was the last I heard from them.

One thing I have gleaned from my discussions with collectors is that they will pay 3-4 times the price of a kit produced pen to buy a quality kitless pen. To me that make the investment in tools worthwhile to a) Learn a new skill b)have satisfaction in making a pen of my own design and c)being well paid for doing so.

With regards taps, I note that Beaufort sell Start, Intermediate and Bottoming taps but in the many online videos I have watched most only seem to use one tap- is there a need for having the set if 3?

One final question- have you combined wood and ebonite in a kitless?- I assume this involves gluing an ebonite insert into the wood blank for the purpose of tapping the treads?

Thanks
Ian
 

silver

General dogsbody
Executive Member
Joined
Jun 29, 2013
Posts
6,304
Location
Somewhere in Staffordshire,
First Name
Eamonn.
Thank you for your response Pierre- my observation from dealing with fountain pen connoisseurs is that metal sections are generally frowned upon- I assume this is because from a purists point of view metal sections do not feature in traditional fountain pen manufacture? Also I think that kit pens are perceived as 'heavy' I've had a couple of potential customers equire about weight and when I confirmed that was the last I heard from them.

One thing I have gleaned from my discussions with collectors is that they will pay 3-4 times the price of a kit produced pen to buy a quality kitless pen. To me that make the investment in tools worthwhile to a) Learn a new skill b)have satisfaction in making a pen of my own design and c)being well paid for doing so.

With regards taps, I note that Beaufort sell Start, Intermediate and Bottoming taps but in the many online videos I have watched most only seem to use one tap- is there a need for having the set if 3?

One final question- have you combined wood and ebonite in a kitless?- I assume this involves gluing an ebonite insert into the wood blank for the purpose of tapping the treads?

Thanks
Ian
I like the part of "metal frowned upon"
Try making fittings out of a bit of scrap metal called Gold...:goesred: yep, it's metal and for the sake of connoisseurs Ian is fully understanding them in the first place.:rolling:

I agree with Pierre--- all the way and with what he has said.

The main reason for a set of three taps is that they are a start thread, intermediate and bottomimg.

A start thread is exactly that, for starting with in the first place. It's a nice easy taper and starts the thread right each time without causing too much stress on the material or taps.

The intermediate is often the tap that is used as the one and only tap which has a less taper than the starter tap.

The bottoming tap, is exactly that. It has no taper. If you want to get the thread completely down the whole of an enclosed plug thread then this is the one.

As you see each one has a specific task, the purest will say use all three and never miss one out.

However I am not the purest and the intermediate one will do for most of the tasks required for pen turning. if you have no experience in threading or tapping then you may well struggle in some metals.

With an intermediate for all tasks then you will need to do the threading very slowly, do a half turn and then back it off a quarter turn. Once it's in fully then you could do half turn and back half turn (or until you hear the thread you are cutting break) you will often get a feeling of a "release" when backing off.

It will be trial and error and practice makes perfect.

What I would do is invest in a metric fine set of taps and dies, you will be surprised what you can actually do with a set of them. My dad started turning and making pens many years ago using imperial taps and dies.

They still worked really well and to be honest I would often wonder if the end user really knew what thread is actually on the pen in the first place.

The only specific taps you need is the ones Pierre spoke about. Specific for feeders such as Bock.

As for wood and ebonite, you can thread wood as well. The connoisseurs you speak about may well not like the idea of glue :thinks:

All in all if you should aim to make the whole of the pen, with the exception of the nib and feeder. That is including the clip, centre band.

Hope that helps.
 

Burt25

Full Member
Joined
Apr 29, 2016
Posts
147
Location
N Ireland
First Name
Ian
I like the part of "metal frowned upon"
Try making fittings out of a bit of scrap metal called Gold...:goesred: yep, it's metal and for the sake of connoisseurs Ian is fully understanding them in the first place.:rolling:

I agree with Pierre--- all the way and with what he has said.

The main reason for a set of three taps is that they are a start thread, intermediate and bottomimg.

A start thread is exactly that, for starting with in the first place. It's a nice easy taper and starts the thread right each time without causing too much stress on the material or taps.

The intermediate is often the tap that is used as the one and only tap which has a less taper than the starter tap.

The bottoming tap, is exactly that. It has no taper. If you want to get the thread completely down the whole of an enclosed plug thread then this is the one.

As you see each one has a specific task, the purest will say use all three and never miss one out.

However I am not the purest and the intermediate one will do for most of the tasks required for pen turning. if you have no experience in threading or tapping then you may well struggle in some metals.

With an intermediate for all tasks then you will need to do the threading very slowly, do a half turn and then back it off a quarter turn. Once it's in fully then you could do half turn and back half turn (or until you hear the thread you are cutting break) you will often get a feeling of a "release" when backing off.

It will be trial and error and practice makes perfect.

What I would do is invest in a metric fine set of taps and dies, you will be surprised what you can actually do with a set of them. My dad started turning and making pens many years ago using imperial taps and dies.

They still worked really well and to be honest I would often wonder if the end user really knew what thread is actually on the pen in the first place.

The only specific taps you need is the ones Pierre spoke about. Specific for feeders such as Bock.

As for wood and ebonite, you can thread wood as well. The connoisseurs you speak about may well not like the idea of glue :thinks:

All in all if you should aim to make the whole of the pen, with the exception of the nib and feeder. That is including the clip, centre band.

Hope that helps.
Thanks Eamonn,

I don't get the issue with metal sections (I didnt realise it was an issue until a couple of potential customers raised it) but then Im not a collector or an expert in fountain pens, I just make them!
I've also been asked if I do custom nib grinds and obviously thats whole other ball game! :thinks:

I think I will start off by having a go at making a section to take a bock #5 nib and work from there. Once and IF I've mastered the threading then I may look at getting the triple start tap and die so I can try and go the whole hog.

Any advice on holding the piece to shape the outside? I have a small Axminster Precision Pro lathe which has an ER20 Collet and was thinking of making a number of threaded mandrels out of say Corian to slip into a 12mm Collet? I assume as far as wood is concerned, close grained / dense woods like Ebony, African Blackwood etc will potentially thread successfully?
 

Phil Dart

Moderator
Executive Member
Joined
Nov 28, 2014
Posts
5,458
Location
Colebrooke, Devon
First Name
Phil
Ian - lots of helpful answers and tips already, but let me see if I can contribute, to help get you started.

The goal in the first instance is to establish your principles and techniques without the vast expense, therefore if at the beginning you can get by with what you already own, or you can buy in economically in order to find out what is what, so be it - you can always upgrade to better and/or more desirable tools in the future.

In the first instance, to arrive at sizes for all your components, you need to understand that absolutely everything is governed by the need to get an ink converter in and out of your barrel, and that every single other dimension on your design stems from that. Therefore you need to start with the inside of the pen and work outwards, rather than worrying in the first place what size cap thread you should be using or is this drill bit better than that.

Ink converters vary - the cheap plastic ones tend to be narrower, the better, metal sealed ones are wider - the Beaufort converter is about 7.8mm. Therefore the minimum inside diameter of your nib/barrel connector needs to be a minimum of 8mm. That diameter translates directly to the outside diameter of the connector, which in turn translates directly to the male thread of the section, the inside diameter of the section being governed by the size of nib you choose to work with.

The outside of the nib connector is also relevant the the cap thread, and although I realise that what I have just written may be absolute double dutch on first reading it through, reading it again until you can relate it to the different parts will show you that the cap thread is directly related to both the converter and the nib size. Before you spend a single penny on tools, you should sit down with pencil and paper, and a good eraser, and work it all out. The wall thicknesses of your components needs to take into account that in some places there may be male and female threads that coincide in exactly the same places on either side of the wall, so calculate the minor diameters of each thread too, and take those into account.

To begin with, as has already been mentioned, the only specialist tool you will absolutely have to invest in is a thread tap, or a set of thread taps for your chosen size of nib. They won't go to waste if your design evolves over time because the size of the nib housing is never going to change, beyond whether its a size 5 or a size 6. Everything else can be bought on the cheap to start out - you are only making prototypes and establishing principles to begin with.

Touching on metal sections briefly, there is no rationale whatsoever for disliking them per se, other than some people feel they offer less grip than say an ebonite section. It is also true that a metal to metal cap thread can lead to it coming unscrewed in the pocket. But there are plenty of metal sections out there on extremely expensive commercially available pens, Karas Kustoms and some Kawecos being particularly popular examples, so don't be fooled into thinking that its a definite no-no.

Cap threads on the other hand are slightly different, and the fashion these days is that a multi start cap thread is more desirable than a single start because it takes fewer twists to remove or replace the cap. Most kit pens do it in somewhere between one and two twists, but a quick study of the classic marques in the fountain pen world will show you that they all tend to be between two to three twists. (which is why the Mistral does it in two and a half twists in case you are wondering). Therefore, ultimately you perhaps should invest in multi start thread cutters for your cap thread, which frankly are very expensive (and I'm sure you realise how I know this) but to begin with, just use a cheap single start set, because again, at this stage, you are only establishing your principles.

There is a working drawing of a Bock size 5 housing on the Beaufort Ink website, on the same page as the taps, and I can send you a drawing for the Bock size 6 housing if you need one.

I hope that helps, but as I said above, before you start splashing money around, get a good pencil and eraser, and spend as much time as you need to in order to work out your sizes and principles. Splash the money around once you know what you are doing.
 

Pierre---

Full Member
Joined
Feb 3, 2016
Posts
231
Location
France
First Name
Pierre
my observation from dealing with fountain pen connoisseurs is that metal sections are generally frowned upon- I assume this is because from a purists point of view metal sections do not feature in traditional fountain pen manufacture? Also I think that kit pens are perceived as 'heavy'

With regards taps, I note that Beaufort sell Start, Intermediate and Bottoming taps but in the many online videos I have watched most only seem to use one tap- is there a need for having the set if 3?

One final question- have you combined wood and ebonite in a kitless?- I assume this involves gluing an ebonite insert into the wood blank for the purpose of tapping the treads?

I think the main problem is the weight and the balance of the pen. A kit is nearly twice as heavy as a kitless (around 20g). Use both for half an hour and you will immediately feel the difference.
I only use the bottoming tap, but maybe the intermediate is better, I never tried.
I sometimes used ebonite for the section of a wooden pen to avoid ink stains. If I use wood for the section, I protect it with CA, sanded until the shine is similar to the wood's, so it is hardly discernable.

I've also been asked if I do custom nib grinds and obviously thats whole other ball game! :thinks:

I think I will start off by having a go at making a section to take a bock #5 nib and work from there. Once and IF I've mastered the threading then I may look at getting the triple start tap and die so I can try and go the whole hog.

Any advice on holding the piece to shape the outside? I have a small Axminster Precision Pro lathe which has an ER20 Collet and was thinking of making a number of threaded mandrels out of say Corian to slip into a 12mm Collet? I assume as far as wood is concerned, close grained / dense woods like Ebony, African Blackwood etc will potentially thread successfully?

Modifing a nib to a customer's taste is really interesting, I'm learning a lot avery time, first giving a try on a Chinese IPG, but you need to write with FP on a daily basis to do that.
I would suggest to use a #6. FP lovers prefer big nibs usually. But this is just my 2p.

Threading wood is another story, you cannot really have good results with a die, you need to thread with a router.

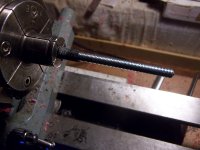
I shape the outside while the pen is in the mandrel (usually in two steps, reversing in between) and then I use a simple home made mandrel for sanding:
 

Attachments

  • 100_0707 comp.jpg
    100_0707 comp.jpg
    362.7 KB · Views: 59

rayf6604

Registered
Joined
May 1, 2014
Posts
2,726
Location
Narrowboat dweller Willington, Derby
First Name
Ray
I wish I'd done what Phil says and thought it through as I spent money before working it all out as I'm crap at drawing. I prefer the trial and error approach.

In my trials and errors I found that the threads Phil refers to, the male and female threads directly above and below each other on the section and the main barrel are the trickiest to get right in terms of the wall thickness you are left with. I think I'm right in saying that the inside thread needs to be minimum of 2mm smaller than the outside thread because once the threads have been cut the actual wall thickness you are left with is less than 2mm. When you add in the slight recess at the very bottom of the outside thread that needs to be cut to allow the two halves to screw together tightly, you can find even a 2mm starting wall thickness is reduced to around 1mm which is too thin. Don't forget that if you drill a hole 2mm smaller than the outside diameter you will have 1mm on either side of the barrel. I could squeeze and flex the acrylic in my fingers, it wouldn't be strong enough to withstand use.


Sent from my iPhone using Tapatalk
 

Burt25

Full Member
Joined
Apr 29, 2016
Posts
147
Location
N Ireland
First Name
Ian
Ian - lots of helpful answers and tips already, but let me see if I can contribute, to help get you started.

The goal in the first instance is to establish your principles and techniques without the vast expense, therefore if at the beginning you can get by with what you already own, or you can buy in economically in order to find out what is what, so be it - you can always upgrade to better and/or more desirable tools in the future.

In the first instance, to arrive at sizes for all your components, you need to understand that absolutely everything is governed by the need to get an ink converter in and out of your barrel, and that every single other dimension on your design stems from that. Therefore you need to start with the inside of the pen and work outwards, rather than worrying in the first place what size cap thread you should be using or is this drill bit better than that.

Ink converters vary - the cheap plastic ones tend to be narrower, the better, metal sealed ones are wider - the Beaufort converter is about 7.8mm. Therefore the minimum inside diameter of your nib/barrel connector needs to be a minimum of 8mm. That diameter translates directly to the outside diameter of the connector, which in turn translates directly to the male thread of the section, the inside diameter of the section being governed by the size of nib you choose to work with.

The outside of the nib connector is also relevant the the cap thread, and although I realise that what I have just written may be absolute double dutch on first reading it through, reading it again until you can relate it to the different parts will show you that the cap thread is directly related to both the converter and the nib size. Before you spend a single penny on tools, you should sit down with pencil and paper, and a good eraser, and work it all out. The wall thicknesses of your components needs to take into account that in some places there may be male and female threads that coincide in exactly the same places on either side of the wall, so calculate the minor diameters of each thread too, and take those into account.

To begin with, as has already been mentioned, the only specialist tool you will absolutely have to invest in is a thread tap, or a set of thread taps for your chosen size of nib. They won't go to waste if your design evolves over time because the size of the nib housing is never going to change, beyond whether its a size 5 or a size 6. Everything else can be bought on the cheap to start out - you are only making prototypes and establishing principles to begin with.

Touching on metal sections briefly, there is no rationale whatsoever for disliking them per se, other than some people feel they offer less grip than say an ebonite section. It is also true that a metal to metal cap thread can lead to it coming unscrewed in the pocket. But there are plenty of metal sections out there on extremely expensive commercially available pens, Karas Kustoms and some Kawecos being particularly popular examples, so don't be fooled into thinking that its a definite no-no.

Cap threads on the other hand are slightly different, and the fashion these days is that a multi start cap thread is more desirable than a single start because it takes fewer twists to remove or replace the cap. Most kit pens do it in somewhere between one and two twists, but a quick study of the classic marques in the fountain pen world will show you that they all tend to be between two to three twists. (which is why the Mistral does it in two and a half twists in case you are wondering). Therefore, ultimately you perhaps should invest in multi start thread cutters for your cap thread, which frankly are very expensive (and I'm sure you realise how I know this) but to begin with, just use a cheap single start set, because again, at this stage, you are only establishing your principles.

There is a working drawing of a Bock size 5 housing on the Beaufort Ink website, on the same page as the taps, and I can send you a drawing for the Bock size 6 housing if you need one.

I hope that helps, but as I said above, before you start splashing money around, get a good pencil and eraser, and spend as much time as you need to in order to work out your sizes and principles. Splash the money around once you know what you are doing.

Thank you Phil for all this useful information- particularly the advice to draw is all first. Im an architect so I'll likely work on a CAD drawing of how everything might go together before I buy anything. Just need to decide between #5 and #6 nib? I was thinking #5, but note from Pierre's comments that #6 seems to be the preferred size with PF users. Once I get something drawn, perhaps I will post it here for a few comments / critique and may be helpful for others thinking of going down this route.
 

Burt25

Full Member
Joined
Apr 29, 2016
Posts
147
Location
N Ireland
First Name
Ian
So Ive done a sketch based on a #6 Bock Nib and Housing and my thought is that its going to be a fairly chunky pen with cap diameter of approx 15mm. This is based on a 12mm tap for the cap / body.

Im thinking the #5 may be a better option to give a bit more flexibility in shaping the section and allowing a bit more wall thickness when drilling / threading. Would be grateful to hear the thoughts of others in this regard. :thinks:
 

Pierre---

Full Member
Joined
Feb 3, 2016
Posts
231
Location
France
First Name
Pierre
If I compare with the last ones I made with a #6 nib (see here), OD are 10mm (section), 13 (barrel) and 14.5 (cap), and weight is 20g (barrel + cap). I think 15 is not too big, because you will be amazed by the low weight and comfort in writing. Just weigh a kit to compare!

With a #5 you can make a thinner section (say around 9mm), you are right. But I don't think it can give you more wall thickness when drilling / threading: you'll still need room for the converter and use a 12mm thread for cap/barrel. But do make a sketch with #5, then you will be able to decide.

Another measurement, very important in my opinion is the step between cap to barrel (i.e. the difference of OD), for the appearance, the look of the pen. To big is clumsy, to little is not well defined, in between is OK, no step (same OD) can be OK too: but what is your correct difference? The step (if any) between section and barrel is also important.
 

Burt25

Full Member
Joined
Apr 29, 2016
Posts
147
Location
N Ireland
First Name
Ian
If I compare with the last ones I made with a #6 nib (see here), OD are 10mm (section), 13 (barrel) and 14.5 (cap), and weight is 20g (barrel + cap). I think 15 is not too big, because you will be amazed by the low weight and comfort in writing. Just weigh a kit to compare!

With a #5 you can make a thinner section (say around 9mm), you are right. But I don't think it can give you more wall thickness when drilling / threading: you'll still need room for the converter and use a 12mm thread for cap/barrel. But do make a sketch with #5, then you will be able to decide.

Another measurement, very important in my opinion is the step between cap to barrel (i.e. the difference of OD), for the appearance, the look of the pen. To big is clumsy, to little is not well defined, in between is OK, no step (same OD) can be OK too: but what is your correct difference? The step (if any) between section and barrel is also important.

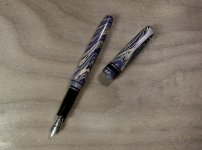
Your pens are stunning Pierre - If I can achieve anything close to that I will be very happy!
 
Warning! This thread has not had any replies for over a year. You are welcome to post a reply here, but it might be better to start a new thread (and maybe include a link to this one if you need to).
Top