As the title but not for woodturning or woodwork. I am still playing with metal and the loco has slowed due to waiting for some replacement casting which I messed up.
This does not mean I have been lazy as there is the garden to keep me occupied and the odd show to attend as well as giving demonstrations in woodturning.
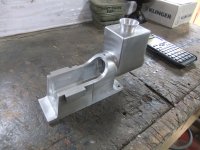
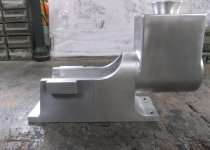
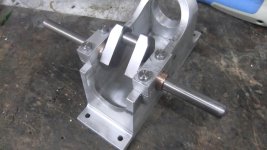
On top of that I have been playing with a Hit and Miss engine and when I say playing I mean making a miniature working one. I have just done a dry fit of some of the parts.
All three parts are ali so far and have yet to be permanently attached as there is still a small amount of drilling to do to two of the pieces
This does not mean I have been lazy as there is the garden to keep me occupied and the odd show to attend as well as giving demonstrations in woodturning.
On top of that I have been playing with a Hit and Miss engine and when I say playing I mean making a miniature working one. I have just done a dry fit of some of the parts.
All three parts are ali so far and have yet to be permanently attached as there is still a small amount of drilling to do to two of the pieces


.jpg")
.jpg")
.jpg")
.jpg")
.jpg")
.jpg")
.jpg")
.jpg")

.jpg")
.jpg")
.jpg")
.jpg")
.jpg")
.jpg")
.jpg")
.jpg")
.jpg")
.jpg")
.jpg")
.jpg")
.jpg")
.jpg")
.jpg")


.jpg")
.jpg")
.jpg")