• Thanks for visiting The Penturners Forum today.

    There are many features and resources that currently you are unable to see or access, either because you're not yet registered, or if you're already registered, because you're not logged in.

    To gain full access to the forum, please log in or register now. Registration is completely free, it only takes a few seconds, and you can join our well established community of like-minded pen makers.

Idea to pen inlay: CNC software steps

clumsysod

GOBBY GIT
Graduate Member
Joined
Apr 7, 2013
Posts
687
Location
Grantham
Thanks for the kind comments guys, now don't laugh but one of the lads has just shown me this.
CNC F Style A-Axis, 4th-Axis, Router Rotational Rotary Axis 3-Jaw 80mm+Tailstock | eBay
I am obviously not daft enough to buy one from here but the weekend joint project will be to mount a homebrew chuck and tailstock across the table as an A axis with the intention of putting a pen mandrel in it.
We already have a motor and the spare port on the controller which I have tested and it is known to work with a little more configuring from the lads I can see this working
 

clumsysod

GOBBY GIT
Graduate Member
Joined
Apr 7, 2013
Posts
687
Location
Grantham
I have enjoyed this little project so much I think I might invest in a desktop cnc machine at home and throw the lathe out.
Had a little play today, following Alex's question on engraving pen clips.
Yes it can be done and easily with the right equipment which I don't have but my efforts are shown below for you to judge.
I have managed to reduce the play in the leadscrews by adding some more nuts and some heavy grease on both sliders and leadscrews has helped tremendously.
What I can do nothing about is the dremel tool we are using as a spindle, I am down to the last bit and that is pretty knackered too.
I think with some proper gravers or even sharp tips I would get much better results.
I fashioned a small clip vice from some ply wood and a few screws which work extremely well giving a good firm grip on the clip and table.
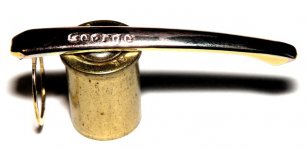
First picture is my practice clip, I had several attempts at this clip and just polished out the results until I got to something legible by sharpening the bit again this is attempt number 5
1.JPG
Please excuse the picture quality too I only have my phone to use for this and I am no photographer.
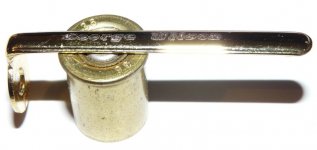
Second picture, now I have the bit as sharp as I can get it without a magnifier and have it all lined up somewhere near right tie for a different clip and serious effort.
2.JPG
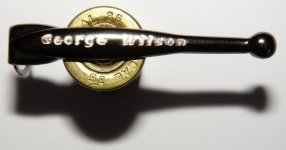
Now how much can I get on a slimline clip this has got to be the ultimate challenge for me due to the shape of it.
As I say I reckon with some more accurate machinery and proper engraving bits this is not a hard task it's a load of fun.
3.JPG
 

bellringer

The Young one
Registered
Joined
Feb 27, 2013
Posts
5,187
Location
Surrey
First Name
Alex
That looks good i think with a sharp bit it will work you may have a business in the making
 

clumsysod

GOBBY GIT
Graduate Member
Joined
Apr 7, 2013
Posts
687
Location
Grantham
That looks good i think with a sharp bit it will work you may have a business in the making

Thank you Alex but I am no businessman this is my hobby and a bit of fun whilst a vast learning experience I love a challenge and rarely fail when I take one on.
There is much more to life than money.
Having said that there is no way I could have done this on my own, I have had a team working on this but made sure I was involved in every stage and asked millions of questions until I understood what I was doing.
I could now do it alone, I just love to learn new things and soak up knowledge like a sponge.
A big thanks to David here too he has been the inspiration and initial drive.
Oh and yes they do look so much better in the flesh, the pictures really don't do them justice.
 

Jim

Grand Master
Joined
Oct 19, 2011
Posts
15,617
I think we should change your name to Cleversod George ... :whistling: To say you are using limited materials and machinery this is a great achievement ..Well done good Sir ... :bwink:
 

clumsysod

GOBBY GIT
Graduate Member
Joined
Apr 7, 2013
Posts
687
Location
Grantham
I think I might have nicked this thread from you David, sorry about that.
I would like to show my latest, once again poor efforts but this is a steep learning curve for me.
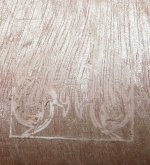
I found some masonry nails that fitted in the dremel collet and sharpened 3 of them at varying angles by eye and put them to work.
I don't have any sophisticated tooling here so it's all guess work I thought you might like to see and give the benefit of your experience.

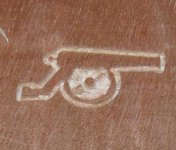
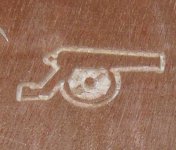
Tip 1 approx less than 1mm point for approx 2mm deep and very sharp, went in full depth but wouldn't pick out the detail. (cannon)
P1070621.resized.JPG

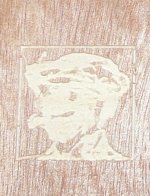
Tip 2 approx 1.5mm tapering to point for approx 2mm deep and very sharp, set to go in 1mm but scratched the surface and pulled it to splinters. (Sepultura)
P1070617.resized.JPG

Tip 3 approx 2mm tapering to a point for approx 5mm deep and very sharp, set to go 3mm deep progressively, picked out detail and gradients but on the wrong material only used a ply packing case for this test (Shed Hermit)
P10706181.resized.JPG

I think I need to try them on some hardwood or soft metal / plastic but there is a scarcity of good practice material, zippo lighter was the best results I had.
 

Attachments

  • P1070621.JPG
    P1070621.JPG
    69 KB · Views: 24

Neil

Fellow
Joined
May 21, 2013
Posts
3,132
Location
Hitchin, Hertfordshire
First Name
Neil
I perused this thread at some length and after due consideration, I concluded that I hadn't got a bloody clue what the hell you're on about!
 

Jim

Grand Master
Joined
Oct 19, 2011
Posts
15,617
I can tell the Shed Hermit George .. What may be a good idea is to start a thread on the work you are doing George, people will be able to follow it better ... Plus i am really looking forward to the Eureka part ... :thumbs:
 

clumsysod

GOBBY GIT
Graduate Member
Joined
Apr 7, 2013
Posts
687
Location
Grantham
I can tell the Shed Hermit George .. What may be a good idea is to start a thread on the work you are doing George, people will be able to follow it better ... Plus i am really looking forward to the Eureka part ... :thumbs:
Good idea Jim, I hope I am working to a eureka moment. a penny drops at every test I do. i have had some intensive learning whilst playing with my toys and not too many clumsy moments so far.
It definitely is safer than ca glue that's for sure and while I am locked out peoples way they like it better, all in all it's that Hamlet moment peace reigns around me.
I do look an idiot sitting at a bench with hardhat and goggles on but those points can do some damage when they ping of the of the dremel.
me.jpg
 

Jimjam66

Chief Battonager
Registered
Joined
Jan 27, 2013
Posts
3,775
Location
Basingstoke, Hampshire
I think I might have nicked this thread from you David, sorry about that.

I started this thread with the express purpose of getting you going, George, so don't sweat it. I had no idea you would run so far so fast!

Your sharpened nails will probably work better on steel than wood, because there will be less grain tearout. Can you receive post where you are? I can put a couple of end mills in an envelope for you if that helps? I love the shed hermit, by the way ...
 

Jimjam66

Chief Battonager
Registered
Joined
Jan 27, 2013
Posts
3,775
Location
Basingstoke, Hampshire
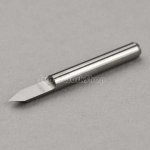
George, something you might try with your sharpened nails is to flatten one side once you have sharpened them, like this:

PCB engraving bit.JPG

The edges might help reduce tearout. if you have a diamond hone you might try sharpening the edges further.
 

clumsysod

GOBBY GIT
Graduate Member
Joined
Apr 7, 2013
Posts
687
Location
Grantham
George, something you might try with your sharpened nails is to flatten one side once you have sharpened them, like this:

View attachment 1208

The edges might help reduce tearout. if you have a diamond hone you might try sharpening the edges further.

Diavd. That is exactly what I did do to them as I saw them on ebay looking like that.
Thanks for the offer of posting some and yes I can receive mail here but by the time it gets here I could well have moved on, it could end up chasing around after me, I wouldn't worry my friend.
Not getting the opportunity to play at the moment but watch this space lol.
 

clumsysod

GOBBY GIT
Graduate Member
Joined
Apr 7, 2013
Posts
687
Location
Grantham
I got a go on the machine today, the geeks have commandeered it and moved it for safe keeping so they say.
Anyway the results after I re-honed the homemade bits showing here this is another practice session.
David your yacht project is so ambitious mate I respect how much so having done this little 8.4mm high effort.
Its so hard to get definition in anything so small let alone cut the parts and insert them. I would need a magnifying glass the size of a dustbin lid.
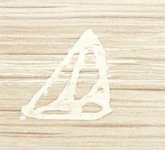
What I am doing here I wouldn't really describe as engraving, more like scratching, I found a piece of I think oak skirting board, or it might not be but wood is rare here.
Its a lot open grained and not ideal for scratching maybe plastic would be better for this bit trying to simulate a pen.
The boat is blown up massively for the picture to be seen.
boat1.resized.JPG
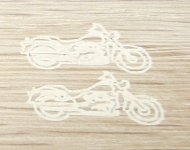
A couple of practices before doing a zippo which is coming soon, I hope to show that when done once again blown up massively.
You may be able to make out how quickly the blade blunts, Do you sharpen yours David or buy new every time?
bike1.resized.JPG

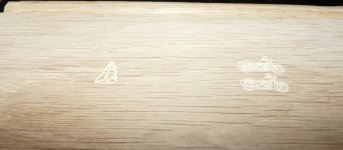
To give you some idea of how much I have blown pictures up here is the piece of wood.
P1070642.resized.JPG
Till the next time I will say I am not the least bit interested in doing any inlays, that my dear friend is a skill I could not develop.
I am happy with a bit of scratching, the lads love to see it and it is a bit of fun in a dull life at the moment.
Damn Geeks are heading for a good slapping if they touch my baby again.
 

Jimjam66

Chief Battonager
Registered
Joined
Jan 27, 2013
Posts
3,775
Location
Basingstoke, Hampshire
Wonderful stuff George! I buy PCB engraving bits (30deg 0.1mm) from China in boxes of 10, like this. Once the tip has gone I toss them and get the next one. At 50p each, I don't lose too much sleep over it!
 

Jim

Grand Master
Joined
Oct 19, 2011
Posts
15,617
George those bikes look the bizz, and very clear to make out ... :bwink:
 
Warning! This thread has not had any replies for over a year. You are welcome to post a reply here, but it might be better to start a new thread (and maybe include a link to this one if you need to).
Top