pittswood
Fellow
Hi guys,
As we all know, Phil from Beaufort Ink has been developing his new ball point and pencil kit. I was given the pleasure of turning the ballpoint pre-development kit this week.
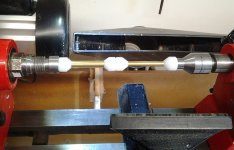
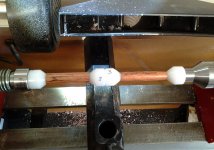
As no pen bushing are available yet, this pen was turned on nylon cones I made myself, out of 20 mm white HDPE rod.
Its easy to drill and turn on a wood lathe, using this type of nylon. I used a letter drill “D” (0.246 in) to produce a hole to fit on my pen mandrels.
The small diameter tube, measured as 5/16th, but I drilled 8.2 mm (or “P” letter drill). This was still a tight fit,that may be the wood?
The large tube, cap end, I drilled as 10.5mm (or 27/64ths).
The cap end tube was all turned down to 0.495 inches diameter (finished). The smaller tube at 0.440 in, mid section to 0.365 to ballpoint side, (finished diameters).
The wood was sanded to 600 grit, two coats of sanding sealer applied. Then three coats of CA glue, let to dry and sanded down to 12000 grit. Polished with T-cut.
I liked the action of the twist and stop style of the pen mechanism which has a very positive feel.
A slightly weighty pen at the cap side, (42g, the same as the Mistral fountain pen kit), due to the all metal construction of the twist innards, but you can feel this is a substantial and quality made ballpoint pen and I like it a lot. Another addition to the Mistral range.
Also the length of this ballpoint is the same as the other Mistral pens.
Putting the pen kit together is different to other pens I made. Once the cap and refill tube is pressed together, It would be very hard to pull apart again. Refills are replaced by removing the nib end, taking out old refill and revising this procedure. This pen uses a Parker style refill.
Please note the clip “O” ring will be slightly larger to fit the top finial.
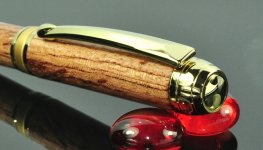
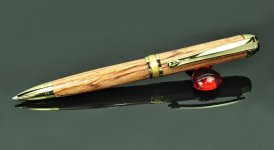
I have attached some photos of the cones and finished pen which I made out of a piece of Bubinga wood that was lying around.
Any thoughts guys, good or bad, will be appreciated, we look forward to them all.
Kelvin


