-
Thanks for visiting The Penturners Forum today.
There are many features and resources that currently you are unable to see or access, either because you're not yet registered, or if you're already registered, because you're not logged in.
To gain full access to the forum, please log in or register now. Registration is completely free, it only takes a few seconds, and you can join our well established community of like-minded pen makers.
You are using an out of date browser. It may not display this or other websites correctly.
You should upgrade or use an alternative browser.
You should upgrade or use an alternative browser.
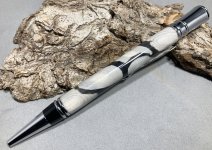
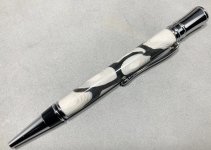
Polymer Clay "Agate" ballpoint pen
- Thread starter KMCloonan
- Start date
Penpal
Grand Master
you gave it a good shot mate.
Hallelujahal
Graduate Member
Think you should be encouraged, I’d be delighted with that result!

So would I. It looks pretty good from where I'm sittingThink you should be encouraged, I’d be delighted with that result!


Hallelujahal
Graduate Member
Gonna get me some Fimo and have a go. Did you wrap the tube and then turn?
alan morrison
Fellow
Kevin, great first go.
Would you be able to gave a bit of insight how you made your pen?
Alan
Would you be able to gave a bit of insight how you made your pen?
Alan
I'm happy to share.Would you be able to gave a bit of insight how you made your pen?
I stumbled on this method while researching polymer clay on Youtube. I will post a link to the video at the end of my post. Technically, the video is about making Jewelry, but when I saw an intermediary step, I instantly knew I wanted to make a pen like what I saw on the screen. I have not achieved my goal, but it wasn't too bad.
First, I created a thin strip of clay with a gradient of gray at one end and white at the other. The strip was about 3cm wide and about 30cm long. I rolled up the clay strip starting with the white end, and ending with the gray - this left white in the middle, and gray on the outside. I then wrapped this roll in a thin single layer of Black clay. Once I wrapped it in the black, I rolled the roll back and forth, gradually stretching it into a longer, smaller diameter tube. I then cut thin slices of from the tube, and placed them onto a small thin sheet of white-ish clay. I cut off a section of this black roll, and rolled it smaller yet, and then filled in some of the gaps between larger circles with smaller circles. You can see the photos below.
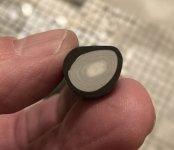
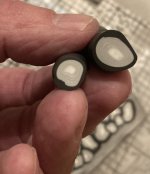
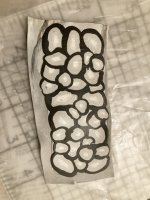
I then rolled the sheet of clay to make it more uniform thickness. Unfortunately, this stretched the circles, making them larger than I wanted, but there was no turning back.
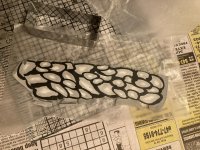
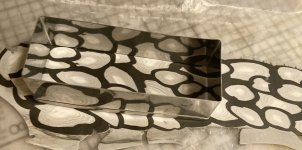
I then used a "cookie cutter" that is made for a specific pen tube size, and cut a piece from the sheet. I scuffed a brass tube, and then carefully rolled the piece onto the tube. It took a little massaging to smoosh the soft clay around to close the seam between the 2 ends. Once the clay seemed to be on the tube properly, I put it onto a simple fixture I rigged from some "T-Track" pieces and a piece of solid copper wire to hang the blank in the toaster oven. I didn't want the blank to sit on the wire rack in the oven, as I was concerned they would imprint on the soft clay.
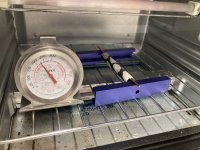
I put the blank in the oven for about 20 minutes at 135C. I took it out, and let it cool a little while, then threw it on the lathe and gently turned it using a carbide negative rake pen tool.
I then sanded as per usual, and applied multiple coats of CA glue, polished with micro mesh, and called it a day.
Below is a link to the video where I first saw this technique. You can fast forward to the 3:08 mark to see this part of the video.
I did! See the post above.Gonna get me some Fimo and have a go. Did you wrap the tube and then turn?
KC
Hallelujahal
Graduate Member
Brilliant stuff Kevin - I'm going to have fun weekend experimenting 

Thanks Alex - I look forward to seeing the results!Brilliant stuff Kevin - I'm going to have fun weekend experimenting

