• Thanks for visiting The Penturners Forum today.

    There are many features and resources that currently you are unable to see or access, either because you're not yet registered, or if you're already registered, because you're not logged in.

    To gain full access to the forum, please log in or register now. Registration is completely free, it only takes a few seconds, and you can join our well established community of like-minded pen makers.

Process photographs

alan morrison

Fellow
Joined
Feb 26, 2019
Posts
2,422
Location
Co. Down N Ireland
First Name
Alan
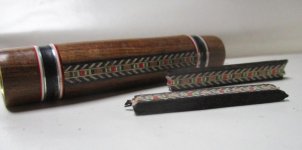
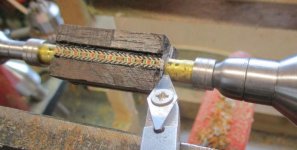
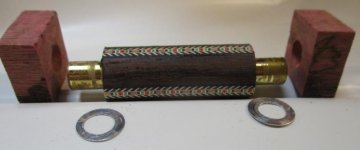
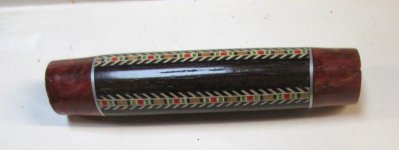
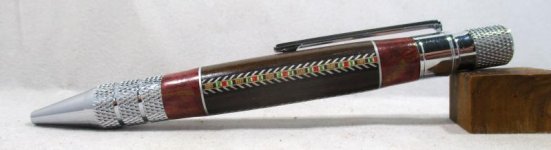
For those interested these photos show how I make pens using purfling.
 

Attachments

  • IMG_1735.jpg
    IMG_1735.jpg
    30.6 KB · Views: 67
  • IMG_1738.jpg
    IMG_1738.jpg
    29.3 KB · Views: 67
  • IMG_1741.jpg
    IMG_1741.jpg
    43.3 KB · Views: 69
  • IMG_1762.jpg
    IMG_1762.jpg
    27.3 KB · Views: 67
  • IMG_1743.jpg
    IMG_1743.jpg
    43.4 KB · Views: 66
  • IMG_1749.jpg
    IMG_1749.jpg
    24 KB · Views: 71
  • IMG_1751.jpg
    IMG_1751.jpg
    23 KB · Views: 70
  • IMG_1758.jpg
    IMG_1758.jpg
    23.3 KB · Views: 68

flexi

Executive Member
Joined
Sep 12, 2014
Posts
6,210
Location
Maidstone
First Name
mark
Thank you..... I have wondered for a while how you did that!! :thinks:
Very clever mate! :thumbs:
 

AllenN

Fellow
Joined
May 20, 2013
Posts
2,243
Location
Lancaster, UK
First Name
Allen
Very clever. Never tend to use my router table much these days, most of the things I do are quicker with hand tools for one off pieces. Might have to get it out now.
 

Padster

Graduate Member
Joined
Jun 12, 2021
Posts
566
Location
Leicester
First Name
Paddy
Thanks. Will have to save that just in case I ever get brave enough to try it or have such patterned wood that I could use!!!

Padster
 

alan morrison

Fellow
Joined
Feb 26, 2019
Posts
2,422
Location
Co. Down N Ireland
First Name
Alan
Very clever. Never tend to use my router table much these days, most of the things I do are quicker with hand tools for one off pieces. Might have to get it out now.

Allen, I have a jig for cutting the slots on the table saw which I will photograph for you.

Alan ( I spell Alan with one L because I'm one 'L' of a fella.)
 

Garno

Fellow
Joined
May 12, 2021
Posts
1,372
Location
Dronfield
First Name
Gary
Is there a reason why you put the end bits on AFTER you have turned the main body of the pen? I am thinking it may have something to do with the washers :thinks:
 

alan morrison

Fellow
Joined
Feb 26, 2019
Posts
2,422
Location
Co. Down N Ireland
First Name
Alan
Is there a reason why you put the end bits on AFTER you have turned the main body of the pen? I am thinking it may have something to do with the washers :thinks:

Gary, it's not really necessary to turn the middle section down, but if it's turned down to the top of the purfling then I have a better idea how much more material I have to play with.
As the purfling is only about 2.5mm thick it's too easy to go too deep.

The washers, by the way, are rings that I cut from a sheet of aluminium. I was able to borrow a jeweller's punch which makes things easy and neat.

Alan
 

Penpal

Grand Master
Joined
May 26, 2013
Posts
25,342
Location
Canberra AUSTRALIA
First Name
Peter
I love purfling and metal gnurling? the colour matching always really neat,the combination a quick and easy way.I have a set up to try doing this length ways,thanks for the inspiration.
:goesred::goesred:
 
Warning! This thread has not had any replies for over a year. You are welcome to post a reply here, but it might be better to start a new thread (and maybe include a link to this one if you need to).
Top